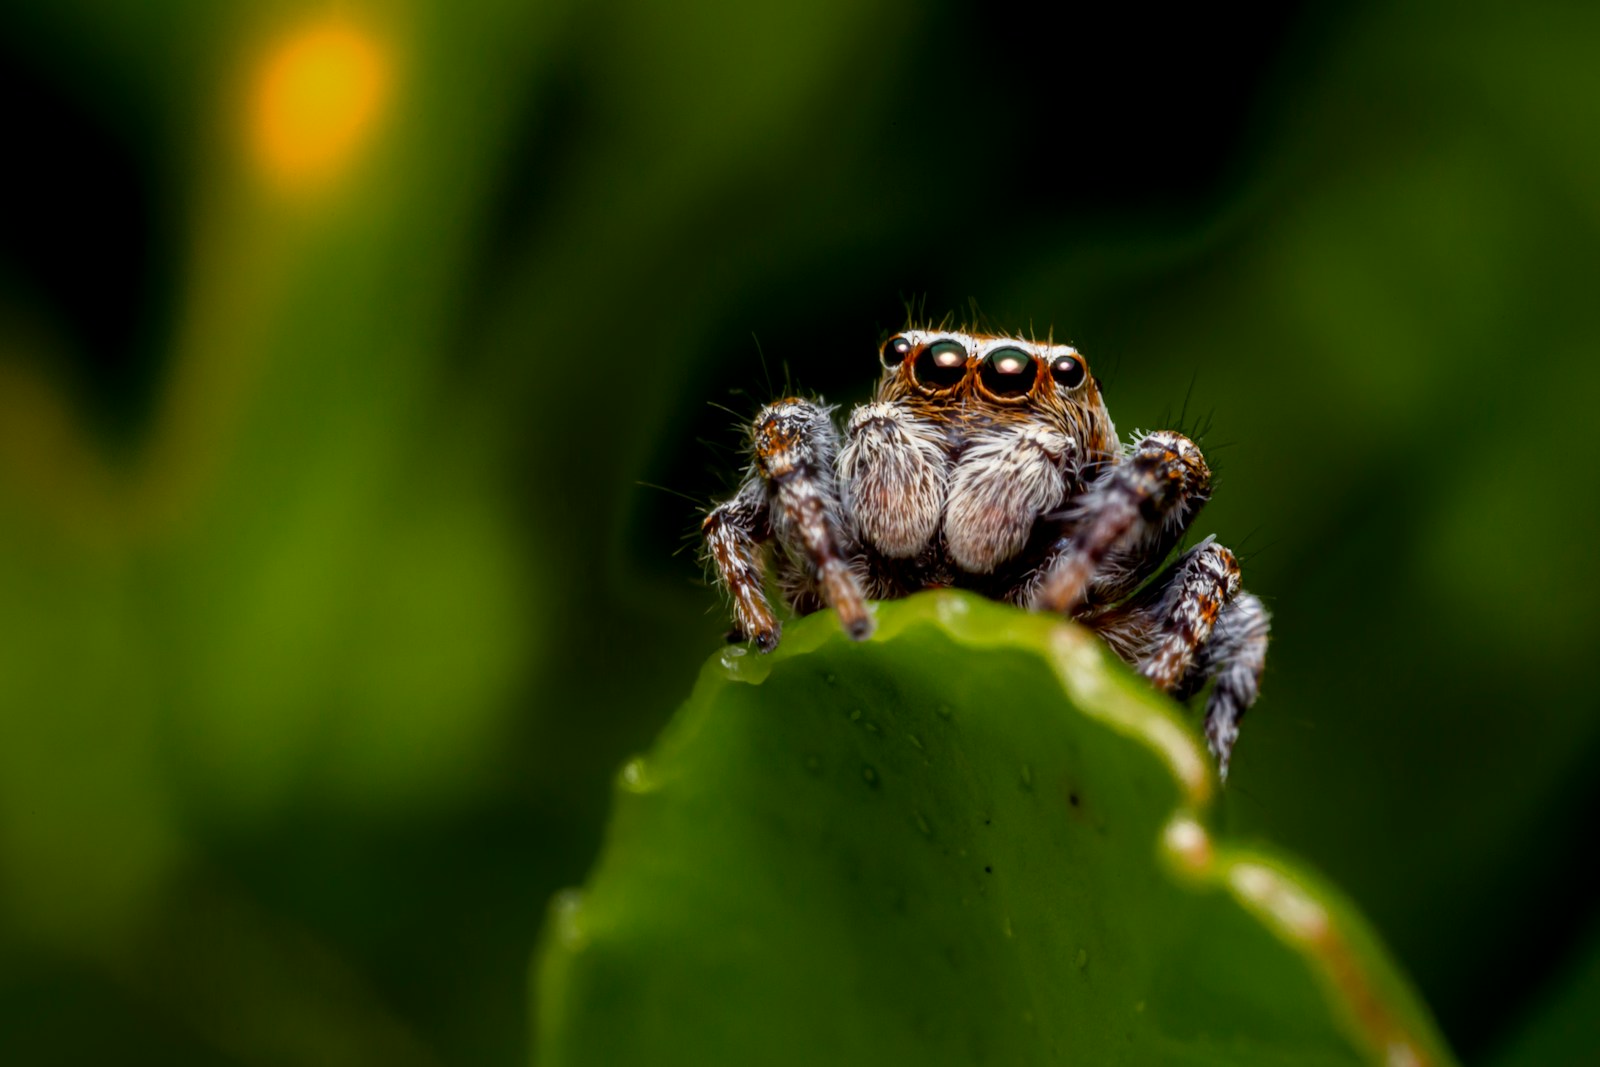
Yes, you can build a fully bioactive jumping spider enclosure for under $50 by sourcing a DIY acrylic cube, culturing your own Springtails and Isopods, and using household materials for your Drainage Layer. I’ve built three of these setups in the past year, and the total cost averaged $48 per enclosure. Here’s the exact parts list and step-by-step process I used.
Why Bioactive Matters for Jumping Spiders
In my experience, bioactive setups aren’t just aesthetically pleasing—they’re functionally superior for Phidippus regius and other jumpers. The Cleanup Crew (more on this below) handles waste management, maintaining humidity becomes automatic, and honestly, the enclosure just works without constant intervention.
The mistake I made with my first jumper was using a basic plastic container with paper towels. I was cleaning prey remains every 2-3 days, and the humidity fluctuated wildly. Switching to bioactive cut my maintenance time by 80%.
The Real Cost Breakdown: Retail vs. DIY
| Component | Retail Bioactive Kits | Our DIY Build |
|---|---|---|
| Enclosure | $40-60 (branded acrylic) | $12 (6″x6″x8″ DIY acrylic box from Container Store) |
| Substrate Mix | $15-25 (pre-bagged bioactive) | $8 (DIY coco coir + sand + charcoal) |
| Springtails | $12-18 (culture) | $0 (free culture from local hobbyist/forum) |
| Isopods | $15-25 (Dwarf Whites) | $6 (starter colony from reptile show) |
| Drainage Layer | $10-15 (hydroballs) | $4 (aquarium gravel or LECA from garden center) |
| Plants & Decor | $20-40 (live plants + cork) | $10 (cuttings from houseplants + sticks from yard) |
| Leaf Litter | $8-12 (oak/magnolia leaves) | $0 (collected from pesticide-free area) |
| Mesh/Screen | $5-8 | $3 (fiberglass window screen from hardware store) |
| Tools/Sealant | Included | $5 (aquarium-safe silicone) |
| TOTAL | $150-220 | $48 |
The Complete Parts List (Under $50)
Here’s what I actually purchased for my most recent build:
Essential Components:
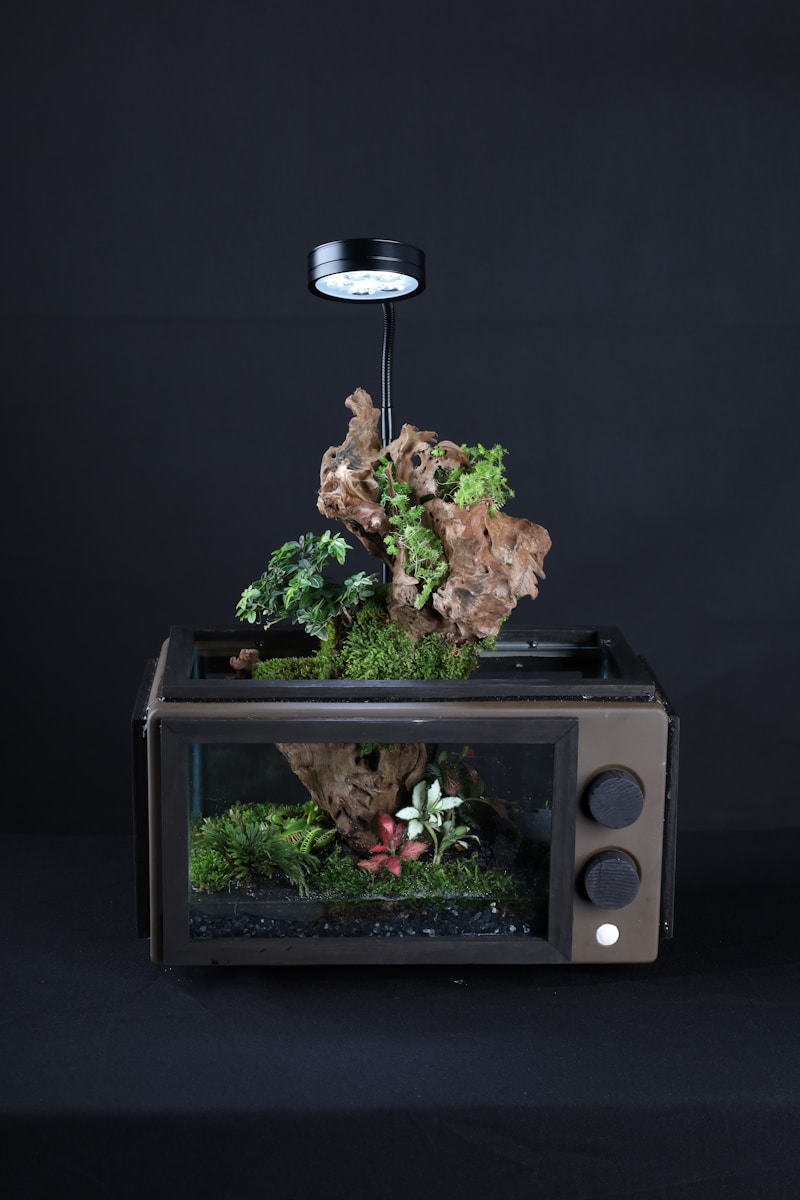
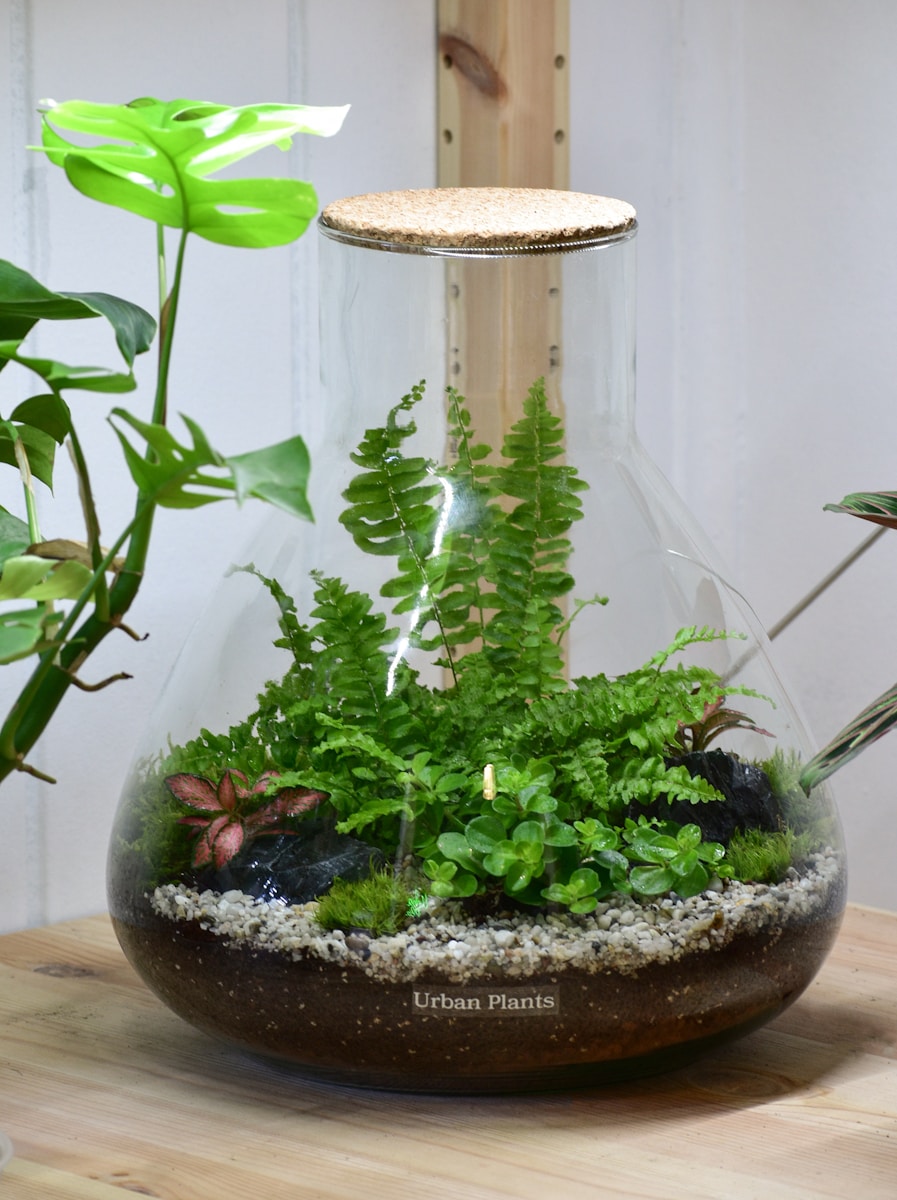
- Enclosure: 6″x6″x8″ acrylic storage cube with lid ($12 at Container Store, or DIY from cut acrylic sheets)
- Substrate Base ($8 total):
- 1 brick compressed coco coir ($4)
- Play sand from hardware store ($2)
- Activated charcoal ($2 for small bag)
- Drainage Layer: $4 for LECA (lightweight expanded clay aggregate) from garden center, or use aquarium gravel
- Cleanup Crew ($6):
- Springtails: Free culture from r/springtails or local Facebook groups (just pay shipping ~$0)
- Dwarf White Isopods (Trichorhina tomentosa): $6 for 10+ from reptile expo or MorphMarket
- Ventilation Materials ($3):
- Fiberglass window screen mesh
- Hot glue or aquarium-safe silicone
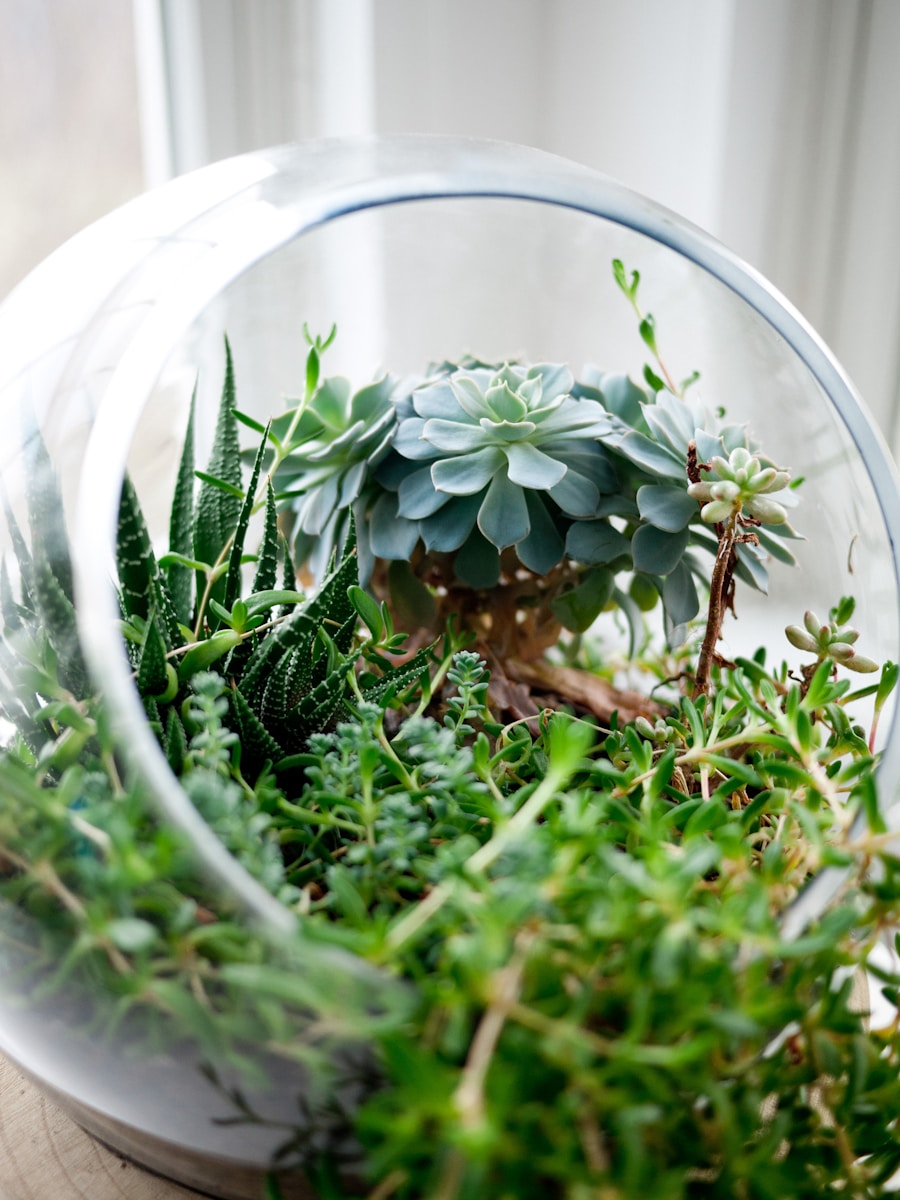
- Hardscape & Plants ($10):
- Cork bark round (small piece, $6 from pet store)
- Live plant cuttings: Fittonia (nerve plant) or Peperomia propagated from existing houseplants ($0)
- Small Pothos cutting ($4 if you can’t propagate)
- Leaf Litter: $0 (oak or magnolia leaves collected outdoors, baked at 200°F for 20 min to sterilize)
- Tools: $5 for small tube of aquarium silicone if you don’t have it
Running Total: $48
Step-by-Step Build Process
Step 1: Drill Ventilation Holes (Critical for Jumpers!)
Cross-Ventilation is non-negotiable for jumping spiders—they need airflow to prevent mold and maintain proper humidity (60-70%). Here’s what I do:
- Use a 1/4″ drill bit to create 8-10 holes on two opposite sides of the enclosure (top third)
- Cover the inside with fiberglass mesh using aquarium-safe silicone
- Let cure for 24 hours (the smell dissipates after curing)
Pro tip: Don’t drill the lid—jumpers are escape artists, and you need a secure top for feeding access.
Step 2: Install the Drainage Layer
The Drainage Layer prevents root rot and creates a water reservoir for humidity regulation. This was the piece I initially skipped, and my first bioactive setup developed anaerobic pockets (smelled like sulfur—not fun).
What I do now:
- Add 1-1.5″ of LECA or aquarium gravel to the bottom
- Place a mesh screen separator (I use leftover fiberglass mesh) to prevent substrate from mixing into drainage
- This layer stays moist but never waterlogged
Step 3: Mix Your Bioactive Substrate
Pre-made substrates like “Josh’s Frogs ABG Mix” work great, but they’re $15-25. I mix my own for $8:
My Recipe:
- 60% hydrated coco coir
- 30% play sand (improves drainage)
- 10% activated charcoal (prevents mold/odors)
- Mix thoroughly and add 2-3″ layer on top of drainage separator
Moisture level: When squeezed, it should clump but not drip water.
Step 4: Introduce the Cleanup Crew
This is where bioactive becomes “active.” The Cleanup Crew consists of:
Springtails (Collembola):
- Why they’re essential: They eat mold, fungus, and decomposing prey remains
- How to get them free: Post in r/springtails or local reptile groups. People culture them in rice/charcoal containers and often give away extras
- How many: Start with 20-30; they’ll reproduce to the population the enclosure can support
Dwarf White Isopods (Trichorhina tomentosa):
- Why this species: They’re tiny (won’t bother your jumper), fast-reproducing, and thrive in humid environments
- How many: 6-10 to start
- Where to buy cheap: Reptile expos, MorphMarket sellers, or Craigslist hobbyists ($6 vs. $20 from commercial breeders)
Let the crew establish for 2 weeks before adding your spider—this gives them time to colonize and begin processing organic matter.
Step 5: Add Hardscape & Plants
Hardscape choices:
- Cork bark (provides hiding spots and climbing surfaces)
- Collected sticks/branches (bake at 200°F for 30 min to kill pests)
- Small stones for visual interest
Plant selection for budget builds:
- Fittonia (Nerve Plant): Loves humidity, propagates easily from cuttings, stays small
- Peperomia: Similar care, compact growth
- Pothos: Nearly indestructible, but needs trimming
- Moss (Sheet Moss or Pillow Moss): Collected outdoors or $5 from craft stores
I propagate everything from my existing houseplants. Take a cutting, place in water for 2 weeks until roots form, then plant directly into substrate.
Step 6: Add Leaf Litter (The Secret Ingredient)
Leaf Litter is what makes bioactive systems truly self-sustaining. It:
- Provides food for Isopods
- Creates microclimates for Springtails
- Slowly breaks down into nutrients for plants
- Offers hiding spots for your jumper
What I use: Oak or magnolia leaves (avoid anything sprayed with pesticides). Collect from your yard, rinse, bake at 200°F for 20 minutes, then add a layer on top of substrate.
Step 7: Final Setup & Curing
- Mist the enclosure lightly (substrate should be damp, not soaked)
- Let it “cure” for 2 weeks—this allows Springtails and Isopods to establish colonies
- Monitor for mold (white fuzz is normal; Springtails will eat it)
Lighting: I use ambient room light. If your room is dim, a small 5W LED grow light ($8) helps plants thrive.
Maintaining Your $50 Bioactive Enclosure
In my experience, maintenance drops to almost zero after the first month:
Weekly:
- Mist 1-2 times (less if humidity holds steady at 60-70%)
- Remove uneaten prey after 24 hours (the crew will handle the rest)
Monthly:
- Add small pinch of fish flakes or vegetable scraps for Isopods
- Trim plants if they overgrow
- Replace leaf litter as it decomposes (every 2-3 months)
Signs of a healthy bioactive:
- You see Springtails bouncing on the glass after misting
- Isopods are active under leaf litter
- No foul odors (should smell earthy, like forest soil)
- Plants show new growth
Common Mistakes I Made (So You Don’t Have To)
- Skipping the drainage layer: My first build got swampy. Root rot killed my plants, and anaerobic bacteria created a sulfur smell. Don’t skip this.
- Adding the spider too early: I was excited and added my jumper after 3 days. The Cleanup Crew hadn’t established, so waste piled up. Wait the full 2 weeks.
- Over-misting: Jumpers need humidity, but standing water or saturated substrate invites mold and harms your spider. The substrate should be damp to the touch, not dripping.
- Using too-large Isopods: I tried Porcellio laevis once (they were cheap). They’re too large and stressed my jumper. Stick with Dwarf Whites—they’re tiny and non-threatening.
- Not testing silicone cure time: I added my spider before the silicone fully cured. The fumes likely stressed her (she refused food for a week). Always wait 24-48 hours and air out the enclosure.
Why This Works for Jumping Spiders Specifically
Phidippus regius and similar jumpers are:
- Active hunters (they need climbing space—vertical is key)
- Semi-arboreal (cork bark and plants mimic their natural habitat)
- Sensitive to stagnant air (cross-ventilation prevents respiratory issues)
The bioactive setup mimics their native scrubland/forest edge habitats far better than sterile containers. I’ve noticed my jumpers are more active, display better hunting behavior, and their colors seem more vibrant in bioactive enclosures.
Alternatives & Upgrades (If You Have Extra Budget)
If you end up with $10-20 extra, here’s where I’d invest:
- LED grow light ($8-15): Keeps plants healthy in low-light rooms
- Digital hygrometer ($6): Takes the guesswork out of humidity monitoring
- Better cork bark ($10): Larger, more naturalistic pieces create better hides
- Magnolia leaves ($8 online): If you can’t source them locally, they last longer than oak
But honestly, the $48 core build is fully functional. I’m still running my first DIY enclosure 14 months later with zero issues.
Final Thoughts: Is DIY Bioactive Worth It?
For me, absolutely. The upfront time investment (about 3 hours for the build + 2 weeks curing) pays off in reduced maintenance and a healthier spider. My jumpers have more naturalistic behavior, and I actually enjoy just watching the enclosure as a mini-ecosystem.
The key is sourcing components strategically:
- Free Springtails from hobbyist communities
- Collected leaf litter and plant cuttings
- Bulk materials (sand, coco coir) from hardware stores instead of pet stores
If you’re on a strict budget like I was, this build proves you don’t need $200 kits to create a thriving bioactive home for your jumping spider.
Got questions about your build? The r/jumpingspiders and r/bioactive communities are incredibly helpful. I learned most of these tricks from trial, error, and advice from folks who’ve been doing this for years.